Digitriser

How to Build a Storage Shed With Basic Tools

Woodworking Plans
How to Build a Storage Shed With Basic Tools

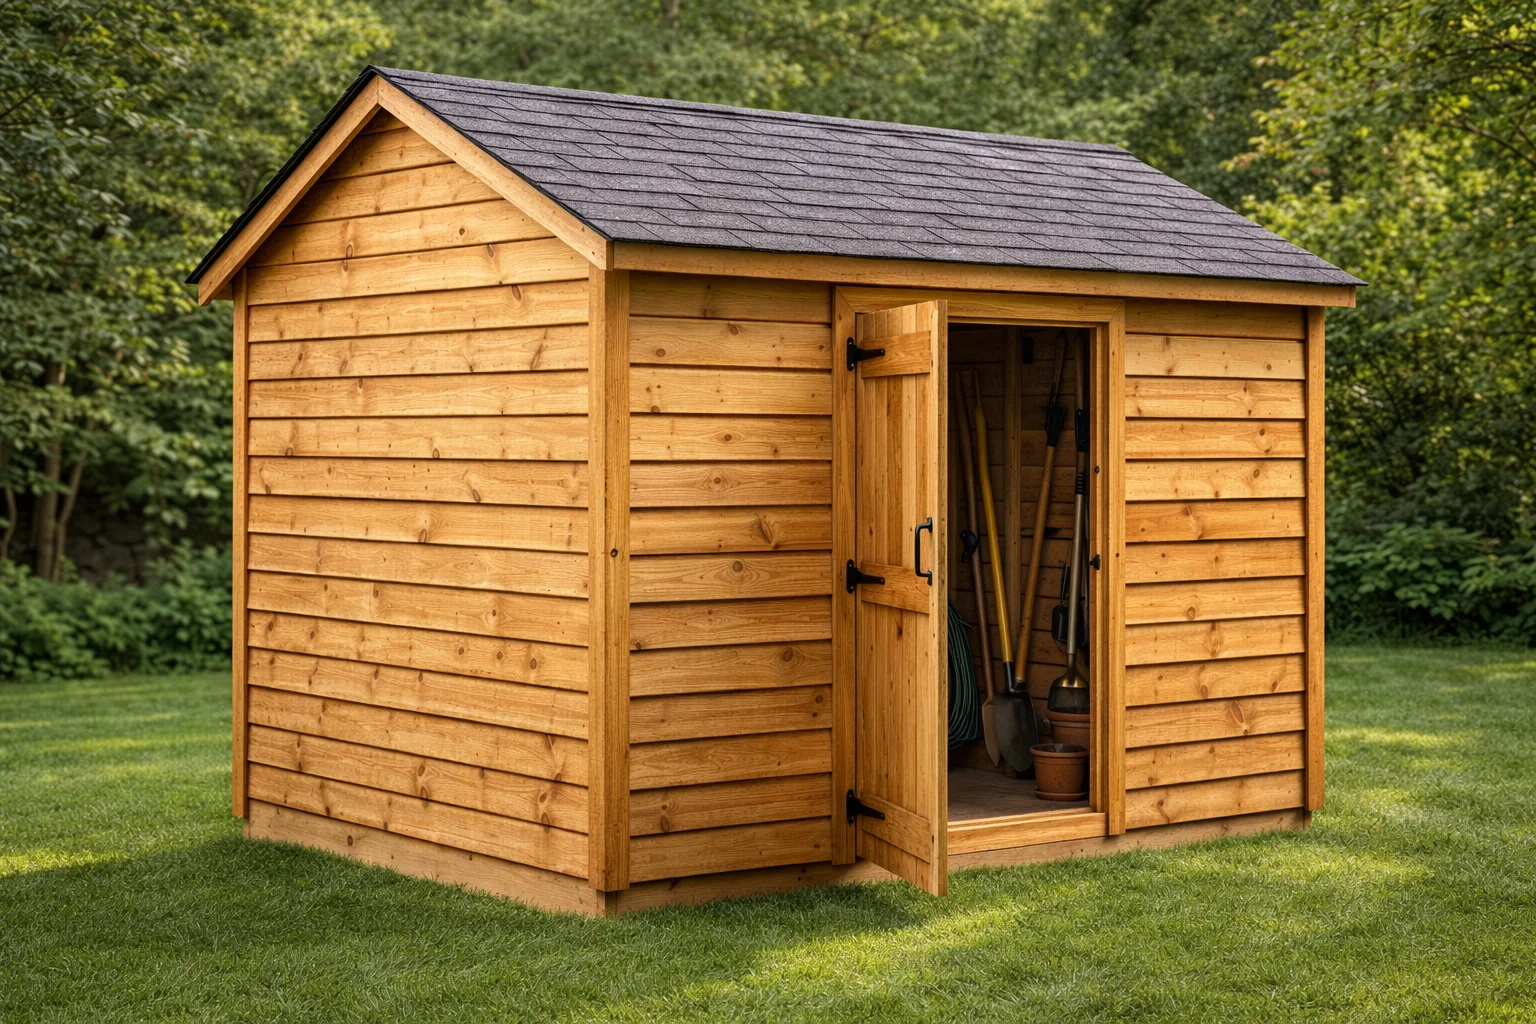
A cluttered garage or overflowing backyard doesn’t have to be your reality. If you want to build a storage shed, you don’t need a contractor or an expensive kit. With basic tools, a weekend, and a solid plan, you can create a sturdy, functional shed from scratch. Whether you’re storing garden equipment, bikes, or seasonal items, a well-built shed adds real value to your property. This guide walks you through every step — from laying the foundation to hanging the door.

Why Build a Storage Shed Yourself?

Hiring a contractor or buying a pre-built shed can cost thousands of dollars. Building one yourself changes the equation completely.

Here’s why a DIY approach makes sense:

With the right guidance, even a first-time builder can pull this off successfully.

What You Need to Build a Storage Shed

Essential Tools

You don’t need a fully equipped workshop. These basic tools are enough:

  • Circular saw or handsaw
  • Cordless drill and drill bits
  • Hammer and nail gun (optional but helpful)
  • Tape measure and carpenter’s square
  • Level (at least 4 feet long)
  • Chalk line
  • Safety glasses and work gloves

Materials List (for an 8×10 shed)

  • Pressure-treated 4×4 lumber for the skid foundation
  • 2×4 studs for wall framing (16-inch on center)
  • 2×6 rafters for the roof structure
  • OSB or plywood sheets (¾ inch for the floor, ½ inch for walls and roof)
  • Metal roofing panels or asphalt shingles
  • Exterior-grade plywood or T1-11 siding
  • Pre-hung door or DIY door frame kit
  • Galvanized nails and exterior screws
  • Roofing felt and drip edge
  • Exterior paint or wood stain

Pro tip: Always use pressure-treated lumber for any wood that contacts the ground. It resists rot and insects far better than standard lumber.

Step-by-Step Guide to Build a Storage Shed

Step 1: Plan and Prepare Your Site

Good preparation prevents major problems later. Start by choosing the right location.

Look for a spot that is:

  • Level or nearly level
  • Away from fence lines (check local setback rules)
  • Well-drained to avoid moisture buildup under the shed
  • Easily accessible from your yard

Check your local building codes before you start. Many areas require a permit for structures over a certain square footage. A quick call to your local municipality saves you from costly issues down the road.

Once you’ve chosen the site, clear all vegetation and debris. Compact the soil or add a layer of gravel for drainage.

Step 2: Build the Foundation

The foundation is the most important part of your shed. A level, stable base prevents doors from sticking, walls from racking, and floors from sagging.

For a basic skid foundation:

  1. Cut two 4×4 pressure-treated beams to 10 feet (the length of the shed).
  2. Place them parallel, 8 feet apart (the width of the shed).
  3. Use a level to make sure both beams sit at the same height.
  4. Add gravel beneath each beam to improve drainage.
  5. Check the diagonal measurements — they should be equal if the layout is square.

A skid foundation works well on relatively flat ground. For sloped sites, consider concrete deck blocks or a post-and-beam foundation instead.

Step 3: Frame the Floor

With the skids in place, you can build the floor frame directly on top.

  • Cut 2×6 joists at 8 feet and space them 16 inches on center.
  • Attach them to a 2×6 rim board on each end.
  • Secure everything with joist hanger brackets for added strength.
  • Lay ¾-inch tongue-and-groove plywood over the frame.
  • Fasten the plywood with exterior screws every 6 inches along the edges.

The floor should feel solid and have no bounce or flex when you walk on it.

Step 4: Frame the Walls

Wall framing goes faster than most beginners expect. Build each wall flat on the floor, then stand it up.

For each wall:

  1. Cut a bottom plate and a double top plate from 2×4 lumber.
  2. Cut vertical studs at 7 feet (standard wall height).
  3. Space studs 16 inches on center.
  4. Frame in your door rough opening on the front wall (typically 38 inches wide for a 36-inch door).
  5. Nail or screw everything together.

Stand each wall up, brace it temporarily, and fasten it to the floor frame. Connect adjacent walls at the corners. Check for plumb with your level before moving on.

Step 5: Build and Install the Roof

A simple gable roof is the easiest option for a first-time shed builder. It sheds water effectively and looks great.

  • Calculate your rafter length based on your desired roof pitch (4:12 is common and easy to work with).
  • Cut a bird’s mouth notch in each rafter where it meets the top plate.
  • Install a ridge board at the peak to connect the rafters at the top.
  • Space rafters 24 inches on center.
  • Sheath the roof with ½-inch OSB panels.
  • Apply roofing felt, then install metal roofing panels or asphalt shingles.

Always start roofing material from the bottom and work upward. This ensures proper water runoff and prevents leaks.

Step 6: Install Siding, Door, and Trim

Now your shed starts to look like a real structure. This step makes a big visual difference.

  • Siding: T1-11 plywood siding is the most popular choice. It installs in large panels and looks clean. Leave a small gap at the bottom to prevent moisture wicking.
  • Door: Hang a pre-hung exterior door for the easiest installation. Shim it carefully so it swings freely and latches properly.
  • Trim: Add corner boards and door trim with 1×4 pine. This seals gaps and gives the shed a finished, professional look.
  • Caulk: Seal all joints and trim edges with exterior caulk to keep water out.

Step 7: Paint and Protect

The final step protects your investment and makes the shed look sharp.

  • Apply a coat of exterior primer first. This helps paint adhere and last longer.
  • Follow with two coats of exterior paint or solid-color stain.
  • Pay special attention to end grain on boards — this is where moisture enters most easily.
  • Add a drip cap above the door for extra weather protection.

A well-painted shed can last 20 years or more with minimal maintenance.

Common Mistakes to Avoid

Even careful builders make avoidable errors. Watch out for these:

  • Skipping the permit: Always check local codes first. Fines and forced removal are expensive lessons.
  • Not leveling the foundation: Even a half-inch difference causes problems throughout the entire build.
  • Using untreated wood on the ground: It will rot within a few years.
  • Rushing the framing: Take time to check plumb and square at every stage.
  • Forgetting ventilation: Add two small vents — one on each gable end — to prevent moisture buildup inside.

FAQ

Do I need a permit to build a storage shed?

It depends on your location and the shed’s size. Most areas require a permit for structures over 100–120 square feet. Always check with your local building department before you start. Building without a permit can result in fines or a required teardown.

How long does it take to build a storage shed from scratch?

A motivated DIYer can complete a basic 8×10 shed in two to three weekends. The foundation and framing take the most time. Having a helper speeds things up significantly, especially when standing walls and installing roof panels.

What is the cheapest way to build a storage shed?

The most affordable approach is to use standard dimensional lumber and OSB sheathing with a simple skid foundation. Avoid expensive shed kits. Sourcing materials from a local lumber yard and doing all the work yourself keeps costs between $500 and $900 for an 8×10 shed.

Conclusion

Building your own storage shed is one of the most practical and rewarding DIY projects you can tackle. It solves a real problem, adds value to your home, and proves that you don’t need fancy tools to build something that lasts. Now that you know exactly how to build a storage shed step by step, all that’s left is to get started.

Pick your site, sketch your plan, and head to the lumber yard this weekend. Share your build photos in the comments — we’d love to see your shed come to life!

Tags :
Storage Shed,Woodworking Plans
Share This :

Have Any Question?

We’re here to help! Whether you need guidance on choosing the right plans or have questions about our recommendations, our team is ready to assist. Reach out anytime—your success is our priority.