Best Way to Sand Furniture Before Painting




Digitriserkamal
29 April 2026
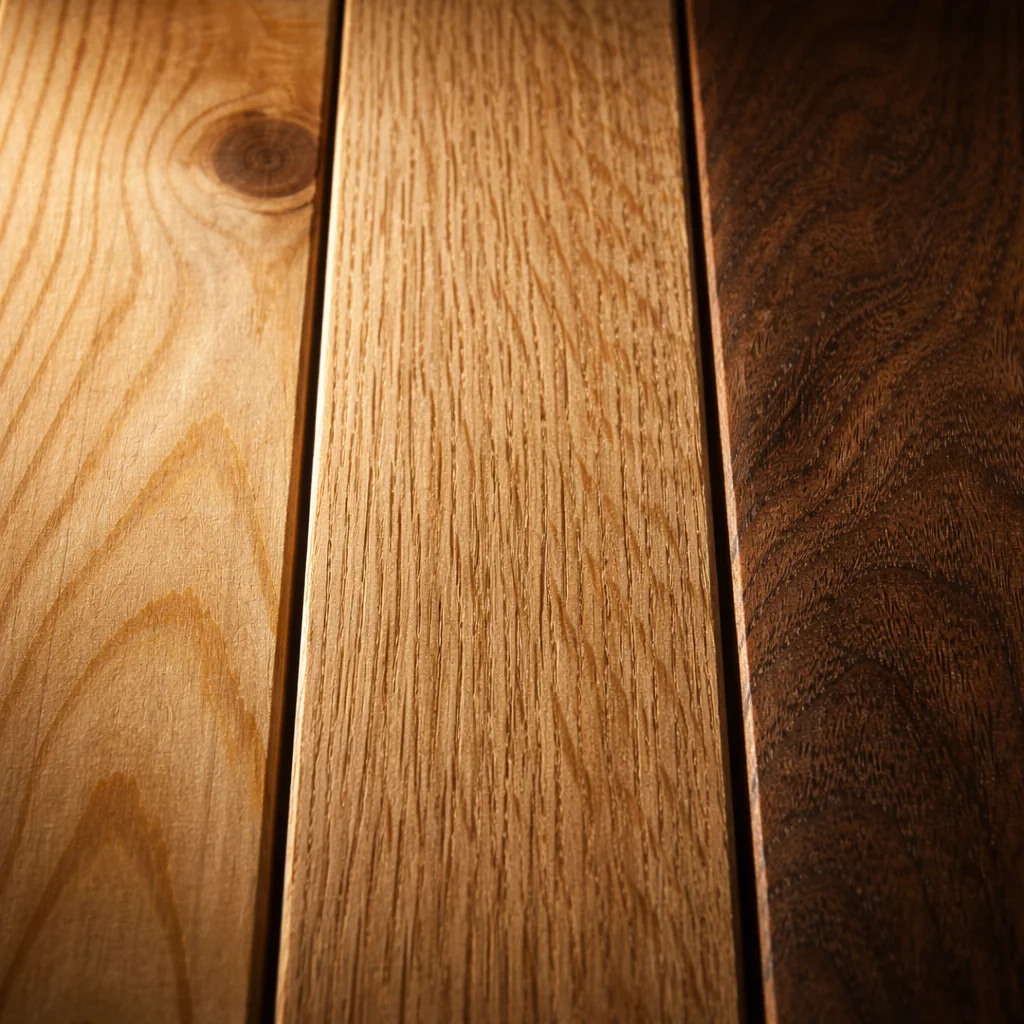
Wood grain is one of those things beginners see but don’t always understand.
You notice the lines and patterns running through a board. You might know you’re supposed to sand “with the grain.” But what does grain actually mean — and why does it change how you cut, join, stain, and finish timber?
Understanding wood grain is one of the most practical skills you can develop early in woodworking. It affects every stage of every build. Get it right and your projects look cleaner, cut more easily, and finish more beautifully. Get it wrong and you’ll fight the wood at every step.
This guide explains everything a beginner needs to know — clearly, simply, and with real-world examples.
Wood grain refers to the direction, texture, and pattern of the fibres that make up a piece of timber.
When a tree grows, it produces layers of cells arranged in a specific direction — roughly parallel to the trunk. These layers form the growth rings you see when you look at a cross-section of a log. The grain is the visual and structural expression of those layers along the length of the board.
Every species has its own characteristic grain. Oak has a bold, open grain with prominent rays and pores. Maple has a fine, tight grain that’s almost featureless. Pine has a soft, irregular grain with knots where branches once grew.
Understanding wood grain starts with recognising these three things:

Grain direction is the single most important aspect of wood grain for a working woodworker.
It determines how the wood behaves when you cut it, plane it, sand it, and apply finish to it. Working with the grain produces smooth, clean results. Working against the grain produces torn fibres, rough surfaces, and surfaces that resist an even finish.
Here’s how grain direction affects each stage of a build.
When you cut along the grain — known as rip cutting — the saw follows the natural fibre direction. The cut is smooth and the timber responds predictably.
When you cut across the grain — a crosscut — the saw severs the fibres cleanly if the blade is sharp. A dull blade tears rather than cuts, producing a rough, splintered edge.
Always use a sharp blade for crosscuts. A fine-toothed blade (40–60 teeth for a circular saw) gives a noticeably cleaner result than a coarse one.
Planing against the grain — from the low side toward the high side of the grain slope — causes the blade to dig in and tear up the fibres. This is called “tearout” and it leaves a rough, damaged surface.
Always plane in the direction the grain rises — from the high side to the low side. Look at the edge of the board to see which direction the grain slopes before making your first pass.
Chiselling follows the same principle. Always work with the grain when paring, never against it.
Sanding across the grain leaves visible scratches on the surface — scratches that become painfully obvious once stain or varnish is applied.
Always sand in the direction of the grain. This is not optional. Even on final-grit passes with 220 grit paper, cross-grain sanding leaves marks that spoil an otherwise good finish.
Stain absorbs differently depending on grain direction and texture. End grain — the exposed cross-section at the cut end of a board — absorbs stain far more heavily than the face grain, producing a much darker result.
If you want even colour across a piece that includes end grain, apply a pre-conditioner or a diluted first coat of stain to the end grain before staining the whole piece. This slows absorption and reduces the colour difference.
When a log is milled into boards, the angle at which it’s cut determines the grain pattern visible on the face of the board. There are three main patterns beginners will encounter.
Flat grain is the most common and most affordable cut. The growth rings run roughly parallel to the face of the board, producing a characteristic cathedral arch pattern — wide, sweeping curves that are immediately recognisable.
Flat grain boards are widely available and less expensive than other cuts. They’re slightly more prone to cupping (warping across the width) as humidity changes, but this is manageable with proper storage and finishing.
A storage crate is one of the most versatile beginner woodworking projects under $50 — and one of the most satisfying to build in multiples.
The construction is five pine panels: two long sides, two short ends, and a base. All panels are the same thickness (18mm). Assemble with wood glue and pocket screws or nails.
Optional: add a small cut-out handle on each short end. Optional: add four castors to the base for a rolling version.
Build one for toys, one for kitchen produce, one for bathroom storage. The same plan, three different uses. Once you’ve cut the first one, the second and third take half the time.
Skills learned: box construction, pocket holes or nailing, repetitive production.
Quarter grain boards are cut so that the growth rings run roughly perpendicular to the face. The result is a straight, parallel grain pattern — consistent lines running along the length of the board.
Quarter sawn timber is more dimensionally stable than flat grain. It’s less prone to cupping and warping, which makes it excellent for tabletops, door panels, and any large flat surface that needs to stay flat.
It’s also more expensive — the milling process produces less usable timber per log.
Rift grain falls between flat and quarter — the growth rings meet the face at roughly 45°. The result is a very straight, consistent grain with almost no ray fleck. It’s the most stable of the three cuts and the most expensive.
Rift sawn timber is used most often in high-end furniture and flooring where appearance and stability are both critical.
Before you make a single cut, spend two minutes reading the grain of your timber. This simple habit prevents the majority of grain-related problems.
Here’s what to look for:
Take a moment to mark the grain direction with a pencil arrow on the face of each board. This simple reference saves time and prevents errors during assembly.
Grain direction also affects how strong your joints are — and this is critical knowledge for furniture that needs to hold up under real use.
The key rule is this: wood is strong along the grain and weak across it. A joint that relies on gluing two end-grain surfaces together is significantly weaker than one that glues long-grain faces.
This is why:
When designing or following a plan, always consider grain direction at every joint. A well-designed woodworking plan accounts for this automatically — specifying grain orientation for each component to maximise both strength and appearance.
Every DIGITRISER woodworking plan includes grain direction guidance as part of the cut list and assembly instructions. You’ll never have to guess how to orient your timber for the best result.
Understanding wood grain transforms the way you work with timber.
It explains why some cuts are smooth and others tear. Why some finishes are even and others blotchy. Why some joints are rock solid and others fail under load.
Read the grain before you cut. Sand with the grain, always. Orient your boards to make the most of the pattern and the strength.
Do that consistently and your projects will look and perform at a level that has nothing to do with how much you spent on materials — and everything to do with how well you understood them.
[Get your DIGITRISER woodworking plans and put your grain knowledge to work on your next project →]
What does it mean to cut with the grain in woodworking?
Cutting with the grain means moving your saw or cutting tool in the same direction as the wood fibres run. When you cut with the grain, the blade follows the natural structure of the timber, producing a smoother, cleaner result. Cutting against the grain — especially when planing or chiselling — tears the fibres and produces a rough, damaged surface that is difficult to sand smooth afterwards.
Why does wood grain direction matter when sanding?
Sanding across the grain leaves visible scratches on the wood surface. These scratches may not be obvious on bare timber, but they become very clear once stain or varnish is applied — the finish settles into the scratches and highlights them. Always sand parallel to the grain direction at every grit stage, including the final pass with 220 grit, to avoid this problem.
What is the difference between flat grain and quarter grain timber?
Flat grain (plain sawn) timber has growth rings that run roughly parallel to the face, producing a wide cathedral arch pattern. Quarter grain (quarter sawn) timber has growth rings running perpendicular to the face, producing a straight, consistent line pattern. Quarter grain is more dimensionally stable — less prone to warping and cupping — which makes it a better choice for tabletops and door panels, though it costs more than flat grain.
We’re here to help! Whether you need guidance on choosing the right plans or have questions about our recommendations, our team is ready to assist. Reach out anytime—your success is our priority.