DIY Wooden Cabinet Plans for Every Room


Digitriserkamal
28 April 2026
One of the biggest myths about woodworking is that you need a big budget to build anything worthwhile.
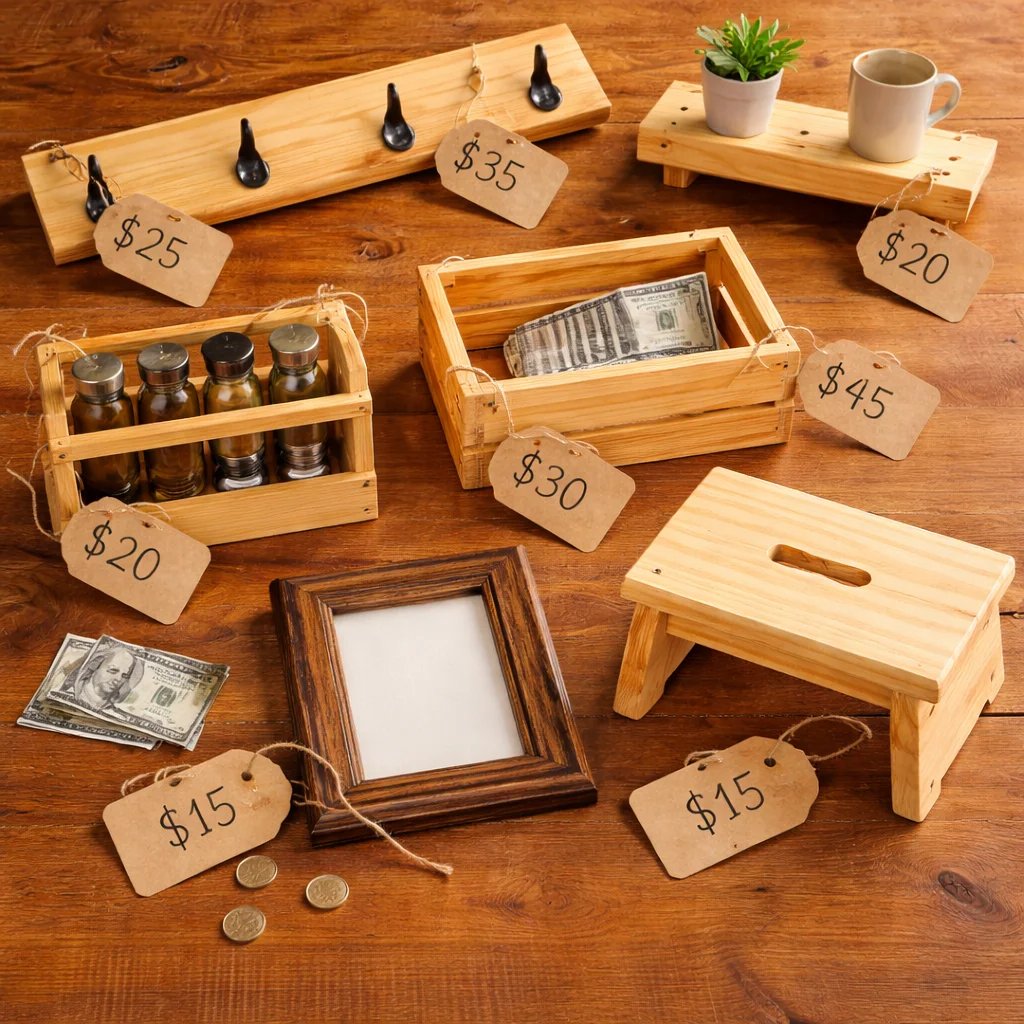
You don’t. Some of the most satisfying projects cost less than a takeaway meal in materials. A serving tray. A coat rack. A picture frame. A storage crate. All of them under $50 — and all of them things you’ll actually use and keep.
This guide covers the best beginner woodworking projects under $50, with real material cost estimates, honest time expectations, and the key tips that make each one achievable on your very first attempt.
Budget woodworking is real woodworking. Let’s prove it.
When you’re learning a new skill, spending heavily on materials adds pressure you don’t need.
A beginner cut that goes slightly wrong on a $5 pine board costs you almost nothing — and teaches you something. The same mistake on a $80 oak slab is far more expensive and far more demoralising.
Starting with low-cost materials lets you:
The beginner woodworking projects under $50 in this guide are also deliberately chosen to teach core skills. Each one introduces a technique that reappears in more complex builds later. They’re not just cheap — they’re genuinely educational.
Before jumping into the projects, it’s useful to know what $50 actually covers in a hardware store.
At current prices, $50 buys approximately:
This means your $50 budget should cover timber, fasteners, and basic finishing supplies for every project on this list. In most cases, you’ll have material left over for the next build.
A coat rack is the definition of a high-impact, low-cost project.
You need a single pine board — approximately 600–900mm long and 100–140mm wide — and three to five metal hooks from a hardware store. The hooks cost $2–$4 each. The board costs $6–$10. Everything else is sandpaper, stain, and wall fixings.
Sand the board smooth. Round the corners slightly. Apply a dark walnut stain for a farmhouse look or leave it natural with a clear oil for a Scandinavian style. Mount your hooks at equal intervals. Fix to the wall with two screws into studs.
Total build time: under two hours. Result: a coat rack you’d pay $60–$90 for in a home décor shop.
Skills learned: basic finishing, hardware installation, accurate marking.
A serving tray is the ideal first build for a complete beginner. It’s small, the cuts are all straight, and the finished result is immediately useful.
You need two short side rails and one wider base panel — all cut from 18mm pine. The handles are cut-outs in the side rails, shaped with a jigsaw or drilled with a large hole saw.
Sand everything to 220 grit. Apply a food-safe finish — mineral oil or a hard-wax oil works well for kitchen items. The result sits on a coffee table or kitchen counter and looks completely intentional.
Skills learned: straight cuts, sanding progression, food-safe finishing.
A single floating shelf beside the bed — wide enough for a book, a glass of water, and a phone — is one of the most useful things you can add to a bedroom.
Use a single pine board: 300–350mm wide, 400–500mm long, 44mm thick for a solid feel. Mount it on two heavy-duty concealed shelf brackets fixed into wall studs.
Sand to 220 grit and apply your chosen finish. A white paint finish suits modern interiors. A natural oil finish suits rustic or Scandi styles. Total material cost sits comfortably under $30.
Skills learned: wall mounting, level installation, simple finishing.
A storage crate is one of the most versatile beginner woodworking projects under $50 — and one of the most satisfying to build in multiples.
The construction is five pine panels: two long sides, two short ends, and a base. All panels are the same thickness (18mm). Assemble with wood glue and pocket screws or nails.
Optional: add a small cut-out handle on each short end. Optional: add four castors to the base for a rolling version.
Build one for toys, one for kitchen produce, one for bathroom storage. The same plan, three different uses. Once you’ve cut the first one, the second and third take half the time.
Skills learned: box construction, pocket holes or nailing, repetitive production.
A spice rack is a kitchen upgrade that costs almost nothing to build and takes a single afternoon.
The design is a shallow wall-mounted shelf — approximately 600mm wide, 80mm deep, with a small front lip (30–40mm high) to prevent jars sliding off. Two wall brackets and four screws hold it in position.
Use a single pine board for the shelf and a thin strip for the lip. Sand, paint or stain, mount level on the wall. Fits inside most kitchen cabinets if you want a hidden version, or mounts openly on a tiled splashback for a café-style look.
Skills learned: shallow shelf construction, accurate levelling, small-scale finishing.
A picture frame is the most precise project on this list — and the most educational.
Four pieces of timber, each cut at exactly 45° at both ends, joined with wood glue and small panel pins. The 45° mitre cut teaches you the most important angle in all of furniture making.
Buy a short length of flat timber moulding from the hardware store. Cut to the frame size you need. Clamp the corners while the glue sets. Finish with paint or a clear varnish.
For under $20, you build a skill and a gift simultaneously.
Skills learned: mitre cuts, clamping technique, precision marking.
A step stool is the most functional project on this list. It lives in the kitchen, the bathroom, or a child’s bedroom — and gets used every day.
The design is two angled side panels connected by two steps. All cuts are straight except for the slight angle on the legs — which can be marked with a bevel gauge and cut with a hand saw or jigsaw.
Use 18mm pine throughout. Round all the edges and corners generously. Apply a non-slip paint or add rubber feet to the base. A well-built step stool easily supports 100kg when the joints are properly glued and screwed.
Skills learned: angled marking and cutting, structural joinery, safety-conscious building.
Staying within budget on woodworking projects requires a few deliberate habits.
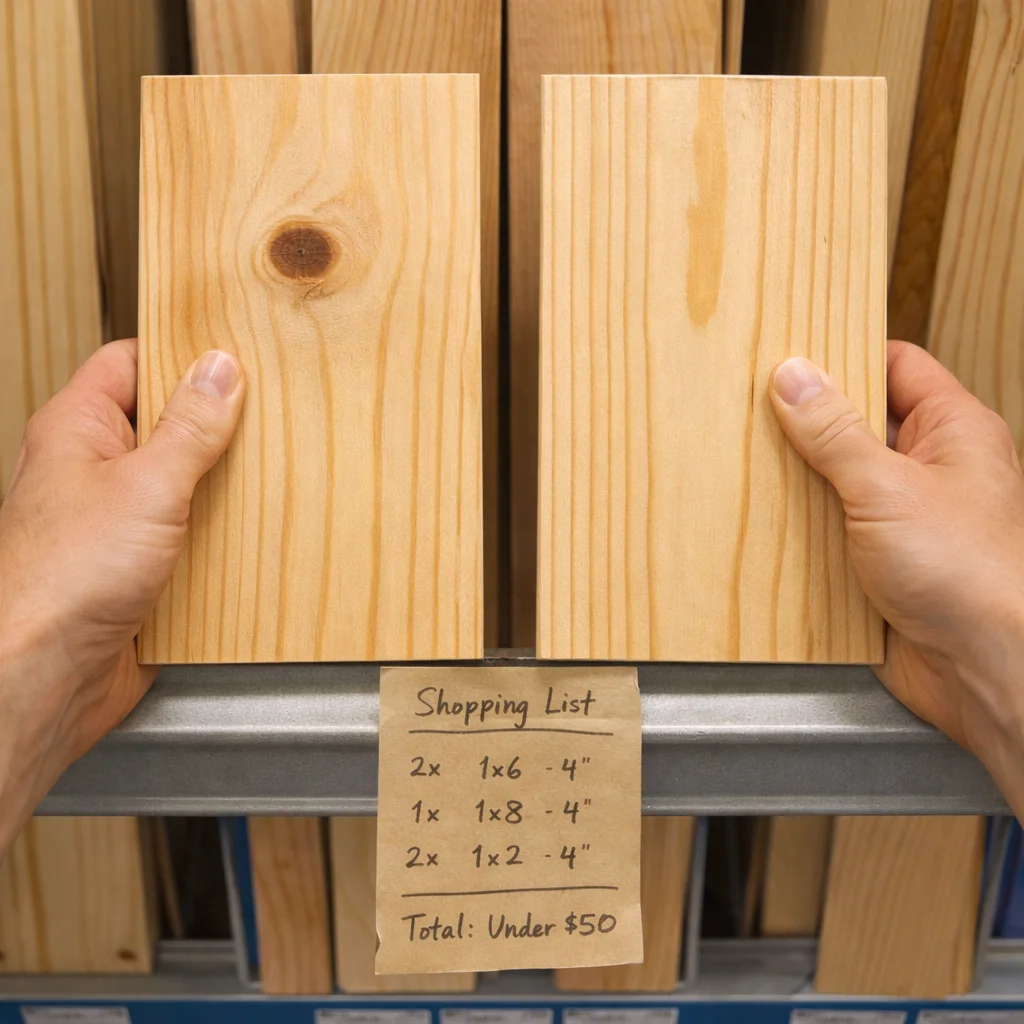
The single most effective way to avoid budget overruns on a build is to work from a plan with a complete cut list. You know exactly what to buy before you walk into the hardware store. You come out with what you need — not what you think you might need.
Every DIGITRISER woodworking plan includes a precise cut list and a complete materials list. You buy exactly the right amount of timber and hardware — no waste, no second trips, no budget surprises.
[Download the DIGITRISER Woodworking Plans E-book and build beautiful projects on any budget →]
Beginner woodworking projects under $50 aren’t compromise builds. They’re smart builds.
They teach real skills. They produce real results. And they prove that woodworking doesn’t require an expensive workshop or a premium budget to be genuinely rewarding.
Pick one project from this list. Buy the timber. Follow the plan. Finish it this weekend.
That first completed project — whatever it is — is the one that changes everything.
[Get your DIGITRISER woodworking plans and start building smarter today →]
What is the cheapest woodworking project for a beginner?
The cheapest beginner woodworking project is a wooden picture frame, which costs $10–$20 in materials. A coat rack and a serving tray both come in under $25. These projects use minimal timber, require only basic tools, and can be completed in a couple of hours — making them the ideal starting point for anyone beginning woodworking on a tight budget.
Can you do woodworking on a $50 budget?
Yes — absolutely. Many excellent beginner projects cost well under $50 in materials, including coat racks, storage crates, serving trays, spice racks, and picture frames. The key is working from a precise cut list so you buy only what you need. Pine is the most cost-effective timber for budget builds, and basic finishing products like Danish oil and furniture wax cost very little per project.
What type of wood is cheapest for beginner woodworking projects?
Pine is the cheapest and most widely available timber for beginner woodworking. Construction-grade pine boards are sold at every hardware store at a fraction of the cost of hardwoods like oak or walnut. Pine is easy to cut, sands smoothly, and takes paint and stain beautifully — making it the default choice for budget builds at every skill level.
We’re here to help! Whether you need guidance on choosing the right plans or have questions about our recommendations, our team is ready to assist. Reach out anytime—your success is our priority.