DIY Wooden Cabinet Plans for Every Room


Digitriserkamal
3 March 2026
Working from home shouldn’t mean sacrificing an entire room for a desk. If you want to build a floating wall desk, you can gain a clean, functional workspace without taking up valuable floor space. This project is perfect for small apartments, home offices, or bedroom corners. With a few basic tools and a free weekend, you can mount a beautiful, sturdy desk that looks custom-built. This guide covers everything — from choosing the right wall to applying the final finish. Let’s get started.
A floating desk is one of the smartest space-saving solutions available. It installs directly onto the wall with no legs touching the floor.
Here’s why so many people choose to build a floating wall desk:

It’s also a project you can realistically complete in a single weekend, even as a beginner.
Keep it simple. These tools are all you need:
Keep it simple. These tools are all you need:
For a standard 48-inch wide floating desk:
Wood options compared:
For most home offices, ¾-inch plywood or a solid pine board hits the sweet spot between cost, weight, and appearance.
Location is everything with a floating desk. Choose a wall that works with your natural light and room layout.
Standard desk height is 28 to 30 inches from the floor. Mark this height clearly on the wall with a pencil.
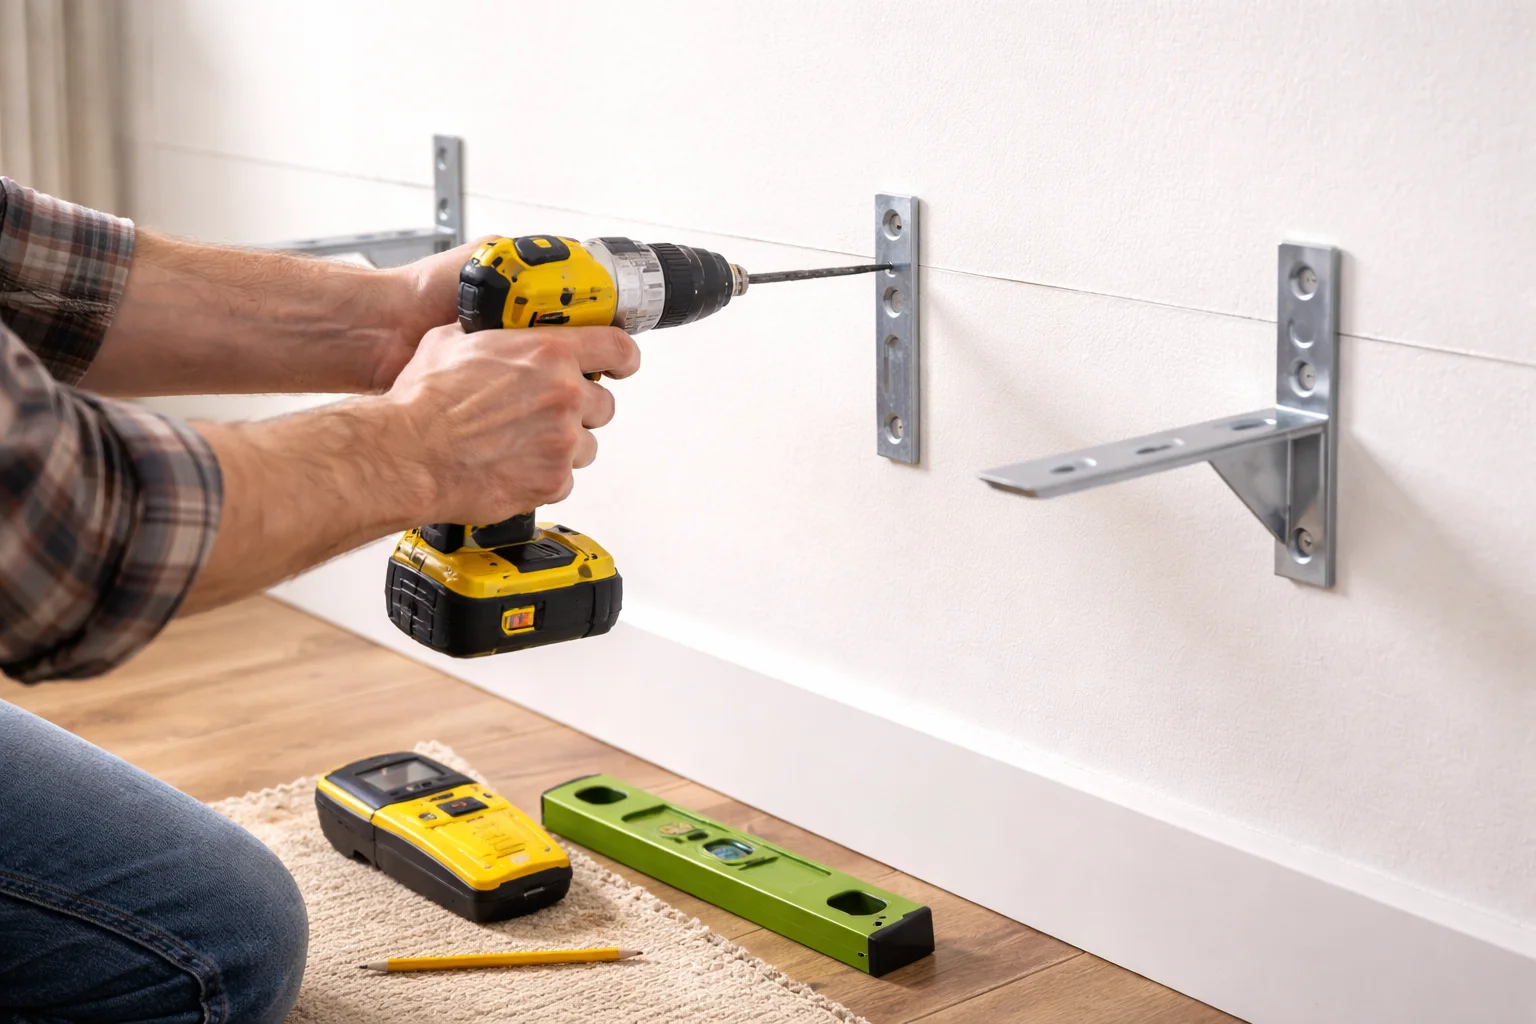
Next, use your stud finder to locate the wall studs. Mark each stud position at your desk height. Studs are typically spaced 16 inches apart.
Important: Always mount your brackets directly into studs. Wall anchors alone will not support the weight of a desk long-term. If your bracket placement doesn’t align with studs, adjust the desk width slightly until it does.
Measure your wall space carefully and cut the desktop to your desired width. A depth of 18 to 24 inches is standard — deep enough for a laptop and monitor, shallow enough not to dominate the room.
A smooth, well-prepared surface makes finishing much easier and the final result far more professional.
It’s much easier to paint or stain the desktop before it’s on the wall. Work on sawhorses or a flat surface.
For a painted finish:
For a natural wood finish:
Popular color choices for a floating wall desk include white, natural oak, walnut stain, and matte black. Choose a finish that complements your existing furniture and wall color.
This step requires precision. A crooked desk is frustrating to work at every day.
Once both brackets are mounted, place a level across the top of both. They must be perfectly aligned. Even a small difference in height will be visible and annoying once the desk is in use.
Bracket spacing tip: Position brackets roughly 6 to 8 inches from each end of the desk. This prevents sagging and distributes weight evenly across the wall.
With the brackets secured, it’s time to attach the desktop. This step is easier with a helper.
Give the desk a firm push from the front and sides. It should feel completely solid with no movement. If there’s any wobble, check that all lag screws are fully tightened into the studs.
Your floating wall desk is installed. A few final details elevate it from functional to polished.
These small additions take less than an hour but significantly improve the workspace experience.
Even simple projects have pitfalls. Watch out for these:
A properly mounted floating desk — with brackets screwed into wall studs — can typically hold 100 to 200 pounds. Always check the weight rating of your specific brackets before purchasing. For heavy monitors or multiple screens, opt for heavy-duty steel brackets rated for 75 lbs or more each.
Yes, always mount into studs for a permanent, safe installation. Drywall anchors alone are not sufficient for a desk that will see daily use and carry the weight of a computer, monitor, and other items. Use a quality electronic stud finder before drilling any holes.
The standard desk height is 28 to 30 inches from the floor for seated work. If you plan to use a standing desk setup, raise this to 40 to 44 inches depending on your height. A simple formula: stand naturally and bend your elbows to 90 degrees — that elbow height is your ideal standing desk surface.
Learning to build a floating wall desk is one of the best investments of a weekend you can make. The result is a clean, space-saving workspace that looks professional and costs a fraction of what you’d pay in a store. With solid brackets, a well-finished desktop, and careful mounting, your desk will serve you reliably for years.
We’re here to help! Whether you need guidance on choosing the right plans or have questions about our recommendations, our team is ready to assist. Reach out anytime—your success is our priority.