Best Way to Sand Furniture Before Painting




Digitriserkamal
6 August 2026

A smooth paint finish begins long before the first coat. Dust, peeling finish, glossy surfaces, dents, and rough grain can all show through fresh paint. The best way to sand furniture before painting is to clean first, select the right grit, sand evenly, and remove all dust before priming.
You do not always need to strip furniture to bare wood. In many cases, the goal is simply to dull the existing finish and create a clean surface for the new coating.
Sanding removes loose material, smooths repairs, and reduces surface shine. It can also soften scratches so they are less visible after painting.
Sherwin-Williams recommends sanding painted cabinetry to create a smoother surface. Its guidance suggests 180- to 220-grit abrasive for final preparation and 320-grit or higher for light sanding between coats when needed.
Sanding does not replace cleaning. Grease, wax, silicone polish, and dirt must be removed first, or the abrasive may spread contamination across the furniture.
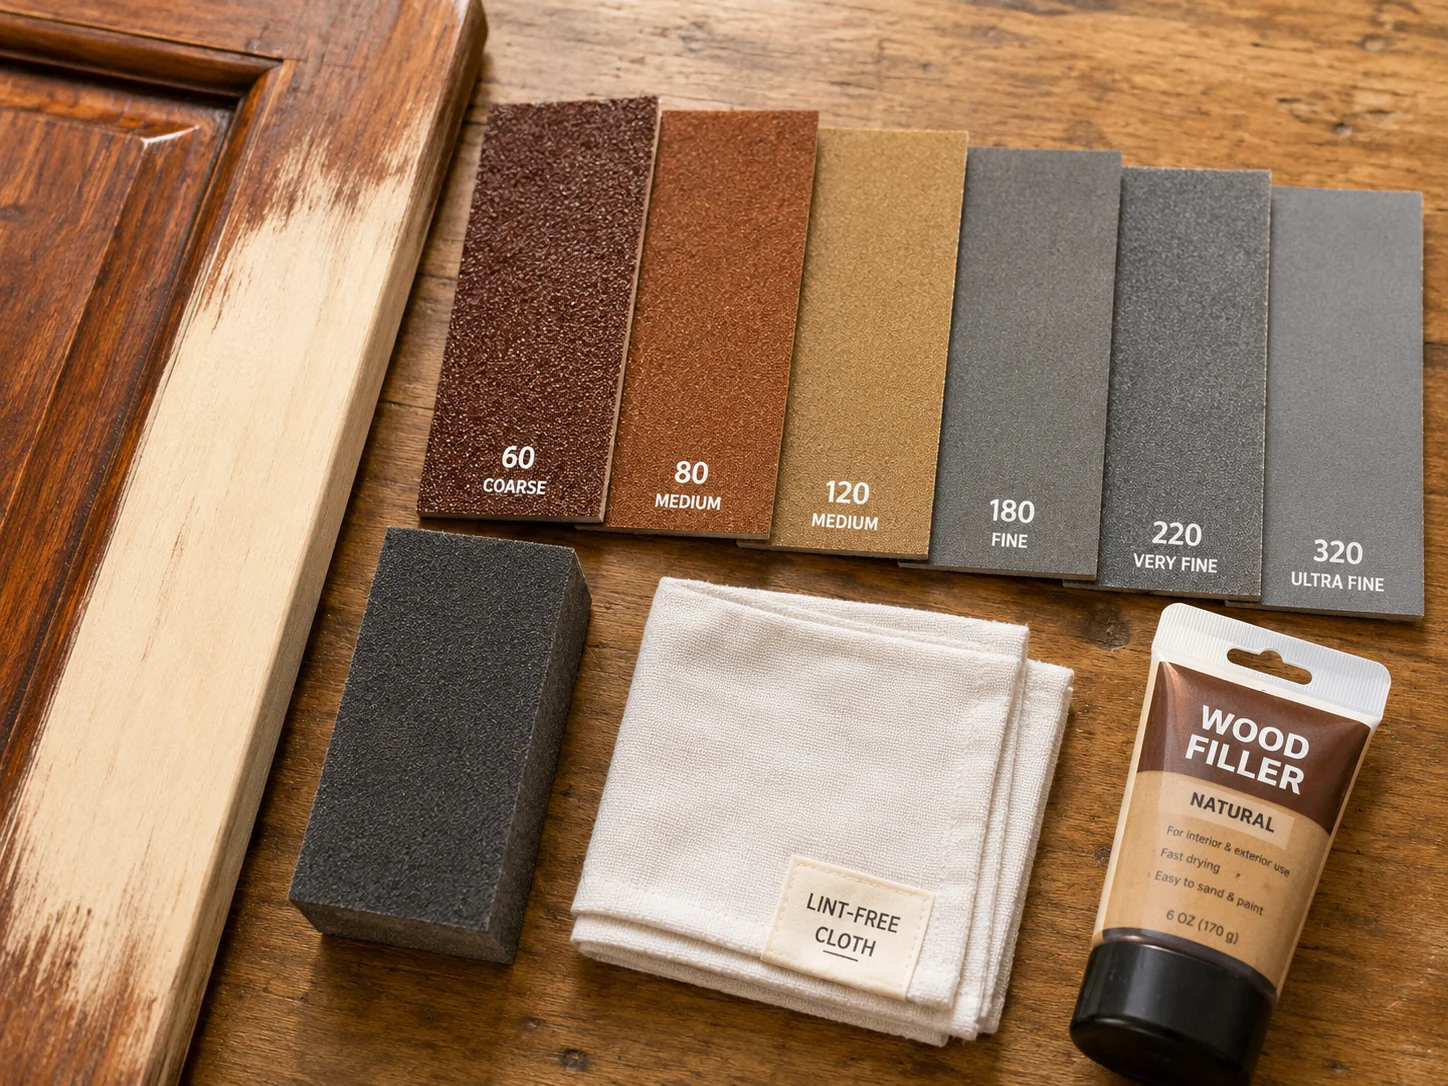
A practical preparation kit may include sandpaper in several grits, a sanding block, a random orbital sander, a vacuum, lint-free cloths, wood filler, eye protection, and suitable respiratory protection.
Use power sanding carefully around veneer, edges, curves, and decorative details. These areas can lose their shape or expose the substrate quickly.
Identify whether the piece is solid wood, veneer, laminate, MDF, or another material. Look for loose paint, water damage, cracks, failing joints, and deep scratches.
Test an inconspicuous area first. Thin veneer and engineered materials require a lighter touch than solid wood.
Take off knobs, pulls, hinges, doors, and drawers when practical. Label parts so they return to their original positions.
This allows you to sand evenly around openings and prevents hardware from damaging the abrasive.
Remove grease, dust, polish, and residue with a cleaner appropriate for the existing finish. Let the furniture dry completely.
Sanding a dirty surface clogs paper and grinds residue into the finish. Pay close attention to handles, edges, and drawer fronts.
Fill dents, gouges, and unwanted hardware holes with a suitable filler. After it dries, sand the repair level with the surrounding surface.
Tighten loose joints before painting. A fresh finish cannot make unstable furniture structurally sound.
Start with the least aggressive grit that will complete the job.
Use 80- to 120-grit paper only for rough wood, heavy defects, or stubborn failing finish. For furniture in reasonable condition, 150- to 180-grit paper is often enough to smooth repairs and dull the coating.
Finish with 180- to 220-grit paper before primer or paint. When starting coarse, move through intermediate grits so each stage removes the scratches left by the previous one.
On bare wood, sand with the grain whenever possible. On painted flat surfaces, make controlled passes without pressing aggressively.
A random orbital sander works well on tabletops and broad panels. Use a sanding block or sponge on corners, moldings, and narrow areas.
Keep the tool moving. Holding it in one place may create dips, round over edges, or cut through veneer.
Vacuum the furniture, joints, corners, and surrounding work area. Follow with a clean lint-free cloth when suitable for the surface, then allow it to dry.
Dust left behind may create bumps in the finish. Random orbital sanders can generate significant wood dust, and NIOSH recommends limiting exposure through effective dust control and suitable protection.
Apply a primer suited to the furniture and paint. Once dry, inspect for raised grain, dust nibs, drips, or rough spots.
Lightly sand imperfections with fine or extra-fine abrasive, remove the dust, and apply the next coat. Avoid sanding through the primer on corners and edges.
Older coatings may contain hazardous substances. In the United States, the EPA warns that abrasive sanding of lead-based paint can create dangerous dust. It recommends containing the work area, minimizing dust, using wet methods or HEPA-connected tools where appropriate, and cleaning thoroughly.
Do not dry-sand an unknown old finish without checking the risks. Consider testing the coating and follow the rules that apply in your location.
Do not begin with coarse paper simply to work faster. Deep scratches may remain visible through the paint.
Avoid excessive pressure, especially on corners and veneer. Do not skip cleaning, rush filler drying time, or paint over loose finish.
Stop when the surface is smooth, stable, and uniformly dull. More sanding is not always better.
Good preparation protects the time invested in a project. A reliable plan also helps you select materials, assemble components, and prepare each part in the correct order.
Our Woodworking Plans e-book includes furniture, storage, décor, and home projects with step-by-step instructions, measurements, material guidance, and useful building tips.
Explore our Woodworking Plans e-book and choose your next furniture project today.
[Discover the Woodworking Plans E-Book]
The best way to sand furniture before painting is to work gradually. Clean first, repair damage, use the mildest effective grit, sand evenly, and remove all dust before priming.
Careful preparation creates the quiet foundation beneath a smooth finish.
No. If the existing coating is firmly attached, clean, and compatible with the new system, you may only need to dull and smooth it. Remove loose or damaged areas.
For many projects, finish sanding with 180- to 220-grit paper. Reserve coarser grits for defects, rough wood, or failing finishes.
Yes, on broad and stable surfaces. Use light pressure and switch to hand sanding around veneer, edges, curves, and detailed areas.
We’re here to help! Whether you need guidance on choosing the right plans or have questions about our recommendations, our team is ready to assist. Reach out anytime—your success is our priority.